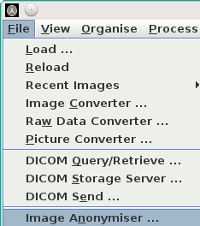
Image Anonymiser from the File menu:
Jim's Image Anonymiser tool can be used to remove and replace sensitive
information in images. It allows the removal of information that may
jeopardise patients' or physicians' privacy. It can work with a single
image, or multiple image files as selected by the user. It will not overwrite the
original image files, but will create a copy of the image but with the sensitive information
removed. By default, for each folder containing images to be anonymised, it will create a sub-folder
called "Anonymised" in which an anonymised copy of the original image will be
created.
Alternatively, you can specify the folder for the anonymised images.
Note: You can also also anonymise sensitive information in images as they are converted into one of the loadable formats. However, you have less control over the anonymisation if you do this.
To bring up this tool, select Image Anonymiser from the File menu:
This brings up the Anonymiser dialog:
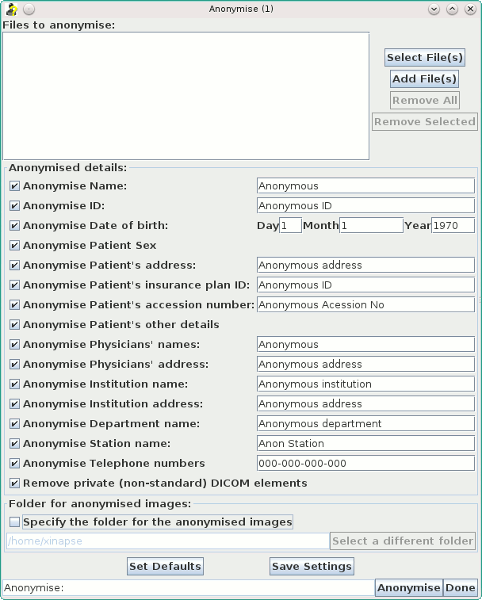
First, select the image file(s) you wish to anonymise by clicking on the
 button. A
file chooser will now pop up. To
select more than one image file, follow the instructions in the
file chooser description.
You can also select a folder (directory) which contains the image files that
you want to anonymise. All image files contained in the folder, and in any sub-folders will be
anonymised.
button. A
file chooser will now pop up. To
select more than one image file, follow the instructions in the
file chooser description.
You can also select a folder (directory) which contains the image files that
you want to anonymise. All image files contained in the folder, and in any sub-folders will be
anonymised.
Next select which fields you want to be anonymised. For example, if the
 check-box is selected, the patient's name
will be replaced in each of the image files by the name set in the Text Area
next to it:
check-box is selected, the patient's name
will be replaced in each of the image files by the name set in the Text Area
next to it:  .
You can change the anonymised text to any text that you wish.
.
You can change the anonymised text to any text that you wish.
If you un-select any of the check-boxes, that information will not be anonymised in the images.
You can also choose to remove all private DICOM elements from the images (if the images contain
DICOM elements) by selecting the
 .
Private elements have odd-numbered group numbers, and sometimes contain duplicated patient-related
information.
.
Private elements have odd-numbered group numbers, and sometimes contain duplicated patient-related
information.
When you are happy with the fields you wish to anonymise, and their anonymised
values, click the  button,
to start the anonymisation.
button,
to start the anonymisation.
The Anonymiser will now start the anonymisation process. For each of the files selected in the list of files to anonymise, the Anonymiser will:
"Anonymised".
If you want your anonymised images to be stored in a different location, select the
 check box.
This enables the panel for you to select the folder where the anonymised images are to be saved.

Enter the location of the folder where you want the anonymised images to be saved in the
field below the check box. You can also click the
 button; a file chooser will then pop up for you to
select the folder.
button; a file chooser will then pop up for you to
select the folder.
Click the  button when
you have finished anonymising.
button when
you have finished anonymising.