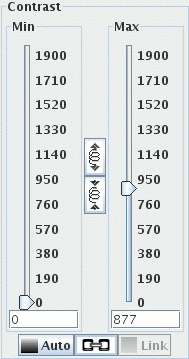
Unless you select a slice all contrast adjustments apply to the whole set of slices. If your computer is not particularly fast, and there are a lot of slices in the image, this can slow down contrast adjustment. To speed things up, select a slice before adjusting the contrast.

 button automatically
adjusts the brightness and contrast, either for the selected slice (if
slice-selected), or for the whole image.
 button sets
all image slices to the same contrast (the contrast of the selected slice).
 ,
then the contrast will
automatically be linked across all slices, regardless of whether you have a
slice selected. To adjust contrast on a
slice-by-slice basis again, click it so it looks like this:
 .
.
If you wish to make fine adjustments to the contrast, click the
 button to expand the available
range. To make coarser adjustments again, click the
 button.
If you find that the
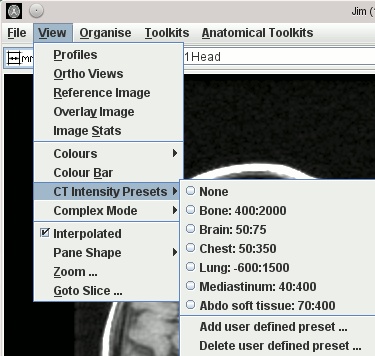
You can set the brightness and contrast to fixed ranges suitable for X-Ray
Computed
Tomography images using the
Selecting one of the presets sets the contrast suitable for viewing one of the
particular type of tissue listed. The numbers refer to the centre intensity
and intensity range of the sliders, in Hounsfield Units.
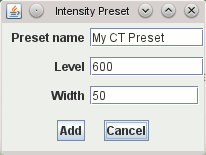
You can also create your own CT presets, by selecting
This will bring up a dialog for you to enter the preset name, window centre and width (in
Hounsfield Units):
 button is greyed-out, or you cannot adjust the sliders, this means that there
is no selected slice, and the slices have different contrast, so Jim
does not know which slice to adjust. Select a slice to
re-activate these features. Then use the "Link" button to set
the contrast the same for all slices if you wish.
CT Presets
CT Intensity Presets menu under the View
menu: 
 ,
,

 ,
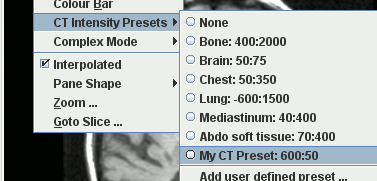
button to create the new CT preset, which will then appear in the View menu:
