If you find that you want to quickly, and repeatedly, save images with a standard set of file names, you can set up "fast-save lists", so you can save the current loaded image with a single mouse click. When you do a fast-save, the image is saved with a fixed name, a fixed (chosen) image format, and with the same type of pixel values, and in the same folder as the current loaded image.
You can set up multiple separate lists of file names to use, so that that you can work on multiple projects, each with their own set of "standard" file names.
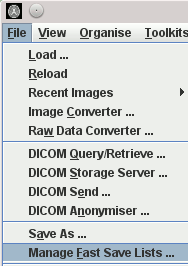
To set a fast-save file name list, select "Manage Fast Save Lists ..." from the
"File" menu:
This will bring up a dialog to create and edit fast-save file lists:
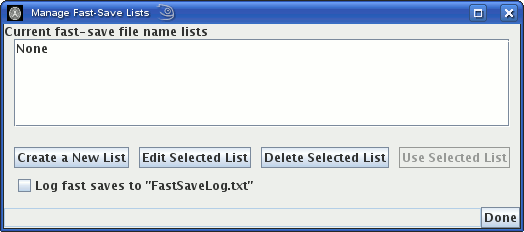
 . This will bring up another dialog for
you to enter a name for the fast-save list (not the name of an individual file name within the
list):
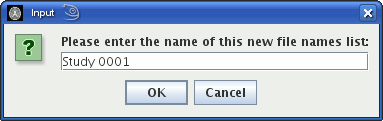
. This will bring up another dialog for
you to enter a name for the fast-save list (not the name of an individual file name within the
list):
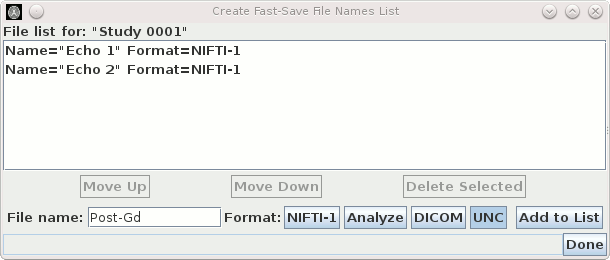
 button. This will bring up a dialog to
enter the individual file names that will be used in your fast-save list, and select the file
format:
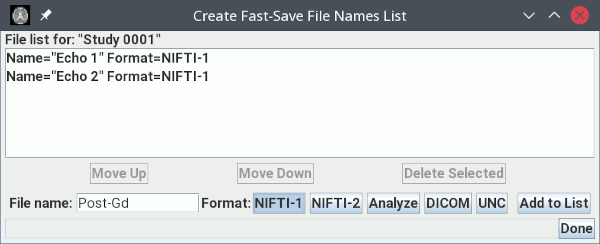
button. This will bring up a dialog to
enter the individual file names that will be used in your fast-save list, and select the file
format:
 button.
You can reorder the file names in your list using the
 and
and
 buttons, and you can remove file names from the
list using the
buttons, and you can remove file names from the
list using the  button.
When you have added all the file names for your project, click the
button.
When you have added all the file names for your project, click the
 button to go back to
the "Manage Fast-Save Lists" dialog, which will now show the fast-save list you have just created:
button to go back to
the "Manage Fast-Save Lists" dialog, which will now show the fast-save list you have just created:
 button); or delete the selected list by
clicking on .
button); or delete the selected list by
clicking on .
To use a fast-save list, select the list and the click the
 button. This will close the dialog, and put
the list of file names in the last-save list into Jim's "File" menu, as shown
below for the fast-save list just created:
button. This will close the dialog, and put
the list of file names in the last-save list into Jim's "File" menu, as shown
below for the fast-save list just created:

To stop using a fast-save list, select "Manage Fast Save Lists ..." from the
"File" menu, then select the list called "None", which is an empty un-editable list and
press the button.