On Macs with Intel processors, you need to install the x64 version of Java; on Macs with Arm 64 (M1) processors, you need to install the Arm 64 (AArch64) version of Java.
There may be multiple versions of Java on your
computer, but you can specify which one to use when you
install Jim. Drag the downloaded Java install file to your
Desktop, then open a terminal window (use Finder to search
for "terminal" if you are not sure how to do this) and type the following commands:
This will install Java 17 to
cd /Library/Java/JavaVirtualMachines
sudo tar xvf ~/Desktop/*jdk-17*.tar.gz
/Library/Java/JavaVirtualMachines.
sudo /Library/Java/JavaVirtualMachines/jdk-17*.jdk/Contents/Home/bin/java -jar ~/Desktop/jim-9-installer.jar
This will launch the installer, and install Jim in
/Applications/Xinapse/Jim9.
Note: on Mac OS 10.9 or later, you may see an error like the one below:
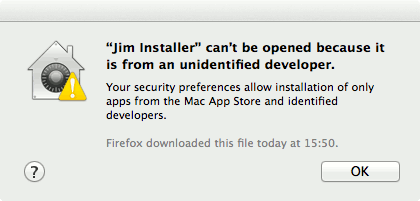
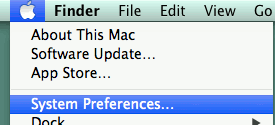
Click the 'OK' button, and then from the Apple menu, select "System Preferences ..."
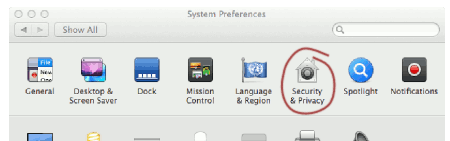
Then click on the 'Security & Privacy' icon:
This will bring up the Security & Privacy settings:
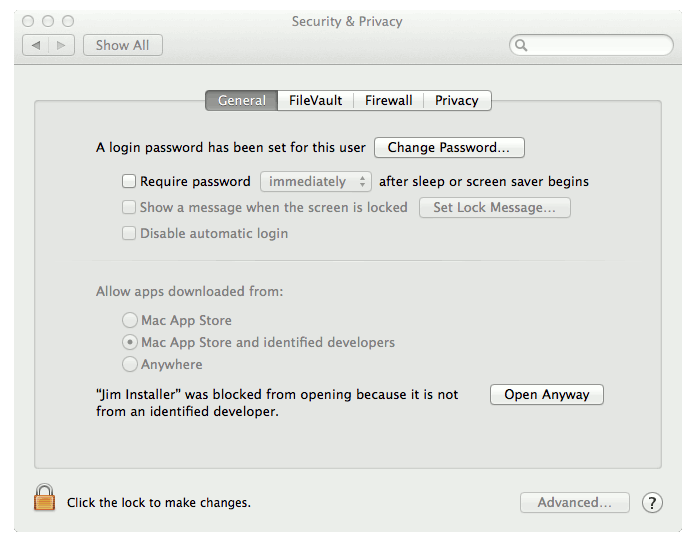
Click lock, then the 'Open Anyway' button, which will enable Jim's installer to run.
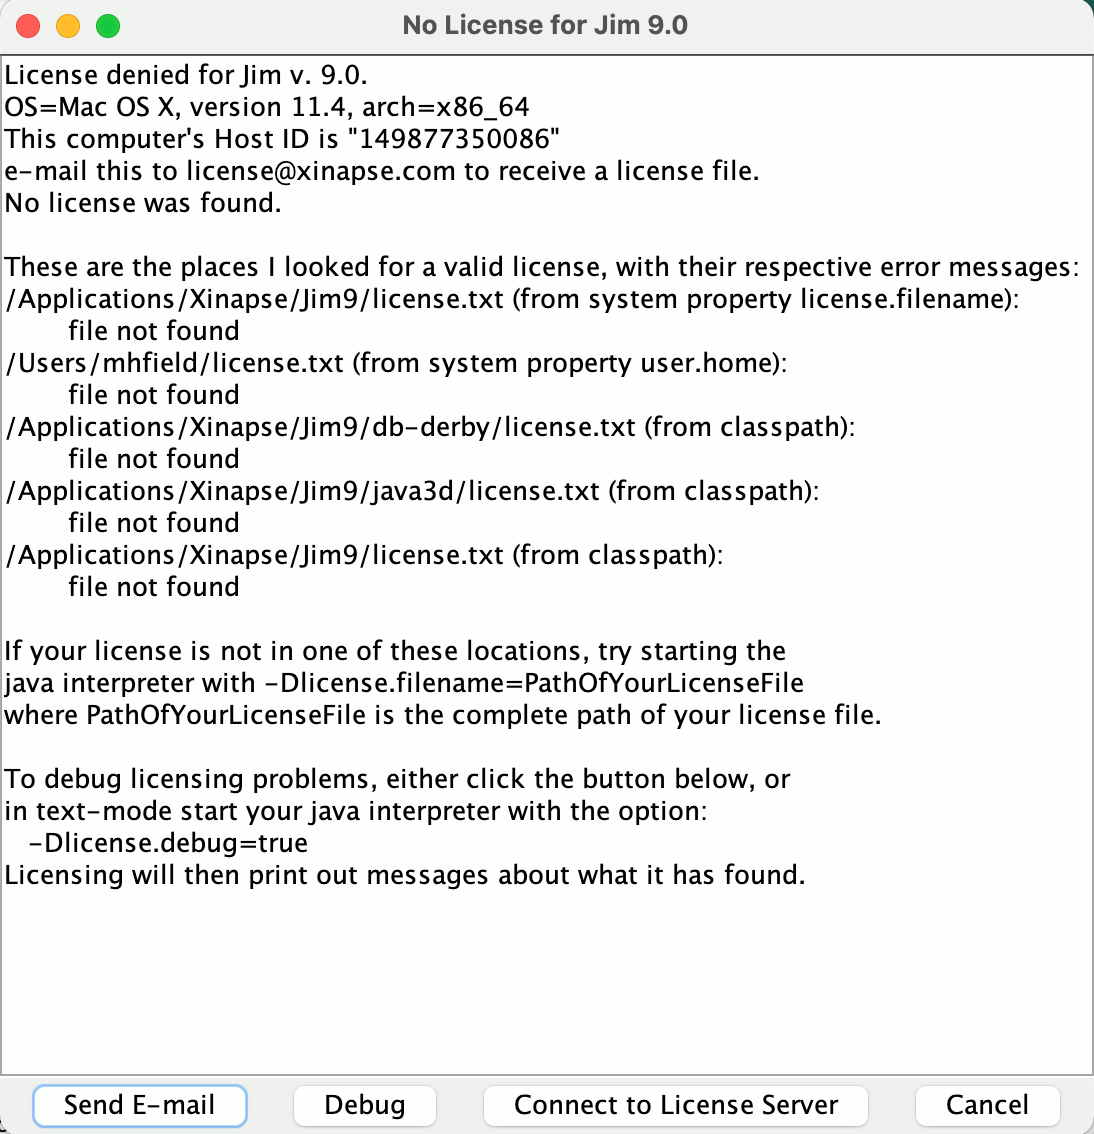
This
              computer's Host ID is "00123FDB5B8C"
. Send the Host ID to
 , and we will
then send you in return by e-mail a license file for Jim.
, and we will
then send you in return by e-mail a license file for Jim.
Note: you can automatically compose an e-mail to
request the license if you click
the  button.
Note: Please use your professional or institutional email address. If you do not, you may not receive a reply.
Note: this is not an automated service, and there will be a delay before you receive your license file.
Note: If you have a network of computers, installation of Jim need not be done on the same computer that you intend to use to run Jim. The Host ID you send should be for the computer on which you intend to run Jim.
If you have received and believe you have correctly installed your
license file, then you can get Jim to print out more detailed
messages about why licensing has failed.
Press the  button. This will pop up a further dialog containing
detailed license debugging messages. You can use these to diagnose the
problem, or e-mail the messages shown in this window to
button. This will pop up a further dialog containing
detailed license debugging messages. You can use these to diagnose the
problem, or e-mail the messages shown in this window to
 , to help us to diagnose the problem.
If you have purchased network (floating) licenses, you can set up the
connection to your license server by clicking on the
 button. See the
instructions for
setting up a connection to a
license server.
button. See the
instructions for
setting up a connection to a
license server.
/Applications/Xinapse/Jim9). Please ensure
that the name of this file is "license.txt".
Please also make sure that the license file in the Jim install folder is NOT an Alias to the license file, but is the actual license text file. If you create an Alias to the license.txt file, Jim will not start.
Applications/Xinapse/Jim9
installation folder and drag the Jim9 icon onto your Desktop for easier
access to starting Jim.
Now see the section on customising a Mac
OS installation.