. When selected, pixels further away
appear darker than those closer to the viewer, improving the sense of 3D perception.
. When selected, pixels further away
appear darker than those closer to the viewer, improving the sense of 3D perception.
 . If your images are not in a
standard radiological slice order (slice number increasing from inferior to superior,
from right to left, and from anterior to posterior) then selecting this
option will reverse the slice order to give the correct orientation in 3D.
. If your images are not in a
standard radiological slice order (slice number increasing from inferior to superior,
from right to left, and from anterior to posterior) then selecting this
option will reverse the slice order to give the correct orientation in 3D.
 . When selected, a glyph
is shown that helps to orientate yourself with respect to the MIP
viewpoint as you rotate the view. The glyph appears like this:
. When selected, a glyph
is shown that helps to orientate yourself with respect to the MIP
viewpoint as you rotate the view. The glyph appears like this:

- L - when visible, the subject's left side is facing you.
- R - when visible, the subject's right side is facing you.
- A - when visible, the subject's anterior is facing you.
- P - when visible, the subject's posterior is facing you.
- S - when visible, the subject's superior is facing you.
- I - when visible, the subject's inferior is facing you.
- Rectangular.
This selects a rectangular region for the MIP. Parts of the image within the yellow shading do not contribute to the MIP. Drag the red handles to change the shape of the shutter.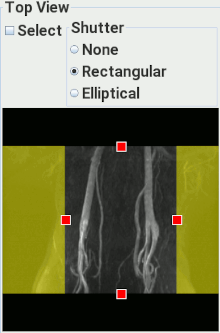
- Elliptical.
This selects an elliptcal region for the MIP.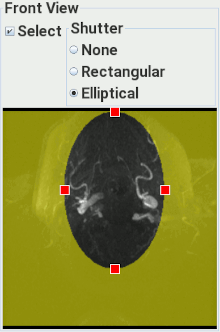 Parts of the image
within the yellow shading do not contribute to the MIP. Drag the red
handles to change the shape of the shutter.
Parts of the image
within the yellow shading do not contribute to the MIP. Drag the red
handles to change the shape of the shutter.
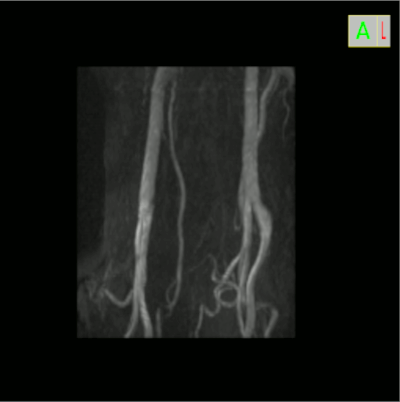
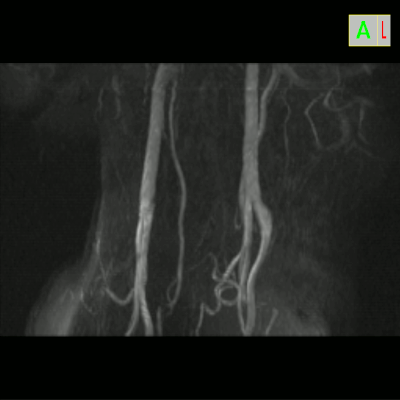
The effect of shutters can be seen below, where the same image is shown both with and without shutters.
|
|
| With rectangular and elliptical shutters | Without shutters |
|---|