Note: if you want to reverse the order of the slices,
specify a step of -1, with the first slice equal to the number of
slices in the image, and the last slice as 1.
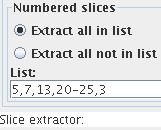
You can also specify extraction of all except the slices in the
list by selecting
When you have set up the slices you want to extract, select the
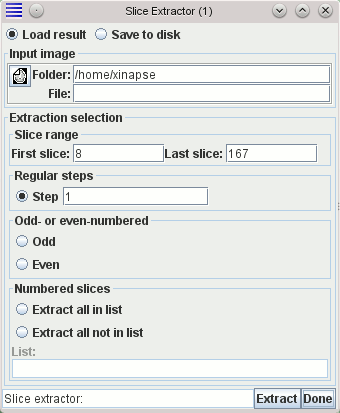
Input Image by clicking on the The Slice Extractor Tool
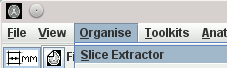
Selecting Slice Extractor from the Organise menu
 of the main display
frame brings up the Slice Extractor Tool:
of the main display
frame brings up the Slice Extractor Tool:


 icon,
or by typing in the folder (directory) and file name of the image, or by pressing the right mouse
button and selecting from the menu of recently-used images.
icon,
or by typing in the folder (directory) and file name of the image, or by pressing the right mouse
button and selecting from the menu of recently-used images.

 button to do the
extraction. If you have chosen to save the result to disk, then a
File Chooser will pop up, prompting
you to choose a file name for the new image. Otherwise, the result
will be loaded into Jim.
button to do the
extraction. If you have chosen to save the result to disk, then a
File Chooser will pop up, prompting
you to choose a file name for the new image. Otherwise, the result
will be loaded into Jim.
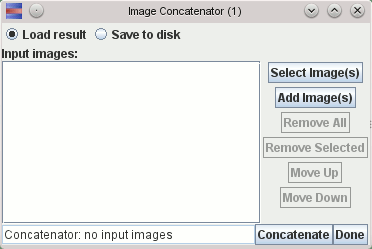
The Image Concatenator Tool
Selecting Image Concatenator from the Organise menu
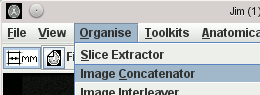 of the main display
frame brings up the Image Concatenator Tool:
of the main display
frame brings up the Image Concatenator Tool:
 button. This will bring up a
File Chooser from which you can select
one or more input images. To select more than one image file, press the
"Control" key down while making your selection. To select all files
in a list, select one file at the top of the list, press the
"Shift" key down, and select a file at the bottom of the list.
You can select any files from the list in this way.
button. This will bring up a
File Chooser from which you can select
one or more input images. To select more than one image file, press the
"Control" key down while making your selection. To select all files
in a list, select one file at the top of the list, press the
"Shift" key down, and select a file at the bottom of the list.
You can select any files from the list in this way.
You can add further images to the list of images to be concatenated by
clicking on the  button at any time.
Ensure that the images are in the order in which you want them to be
concatenated. If they are not in the right order, select one or more
images in the displayed list to move, and the click either the  button or
  button to get them in the right order.
You can remove all the images from the list by clicking the  button, or remove just some of the images by
first selecting them, and then clicking the
button, or remove just some of the images by
first selecting them, and then clicking the  button.
Now click on the
First, select the images to be interleaved by clicking on the
on the
You can add further images to the list of images to be interleaved by
clicking on the
Ensure that the images are in the order in which you want them to be
interleaved. If they are not in the right order, select one or more
images in the displayed list to move, and the click either the
You can remove all the images from the list by clicking the
You can influence the slice spacing of the interleaved image by the setting of the
Now click on the
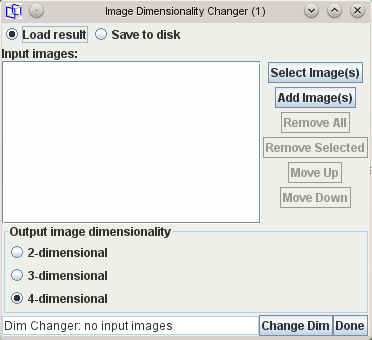
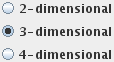
Set the dimensionality required in the output image using the appropriate
button:
If the result is multiple new images, these will automatically be saved to
disk, regardless of the setting.
Select the image(s) whose dimensionality is to be changed by clicking on the
on the
You can add further images to the list of images by
clicking on the
Ensure that the images are in the order in which you want them end up
in the final image(s). If they are not in the right order, select one or more
images in the displayed list to move, and the click either the
You can remove all the images from the list by clicking the
Now click on the
If you reduce the dimensionality, and the result is therefore multiple output
images, the images will be named
For each of the three colour channels (red, green and blue) of the output image:
If you have chosen to save the result to disk, then a
File Chooser will pop up, prompting
you to choose a file name for the new colour image. Otherwise, the result
will be loaded into Jim.
For each of the two complex components (real & imaginary, or magnitude and phase) of the output
image, set the approriate input image in the image selection panels below.
Note: if you select "Magnitide & Phase", the phase image can be in one of two forms:
If you find the phase values in the resulting Complex image are reversed compared to what you
expect or need (perhaps because alternating echoes in an MRI pulse sequence have phase reversal),
then you can select:
If you have chosen to save the result to disk, then a
File Chooser will pop up, prompting
you to choose a file name for the new Complex image. Otherwise, the result
will be loaded into Jim.
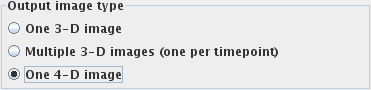
If the result is a single new image (3-D or 4-D) the
new image can either be saved to disk, or loaded into Jim
depending on your selection:
If the result is multiple 3-D images, these will automatically be saved to
disk, regardless of the setting.
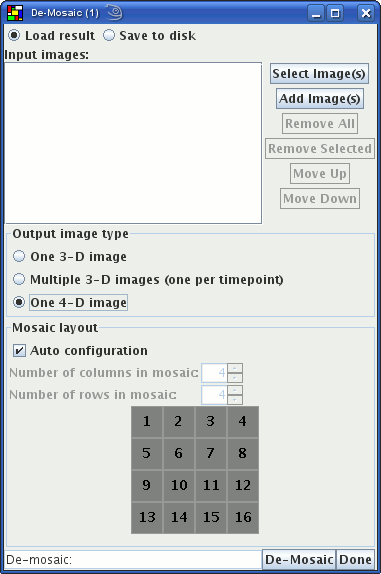
Select the image(s) to be de-mosaiced by clicking on the
on the
You can add further images to the list of images by
clicking on the
Ensure that the images are in the order in which you want them end up
in the final image(s). If they are not in the right order, select one or more
images in the displayed list to move, and the click either the
You can remove all the images from the list by clicking the
You can either set the layout (layout of individual slices in the mosaic manually, or you can have
Jim make a guess at the layout. To have Jim guess the mosaic layout, select the
Now click on the
If you chose to create multiple 3-D output images, the images will be named
 button to do the
concatenation. If you have chosen to save the result to disk, then a
File Chooser will pop up, prompting
you to choose a file name for the new image. Otherwise, the result
will be loaded into Jim.
button to do the
concatenation. If you have chosen to save the result to disk, then a
File Chooser will pop up, prompting
you to choose a file name for the new image. Otherwise, the result
will be loaded into Jim.
The Image Interleaver Tool
Selecting Image Interleaver from the Organise menu
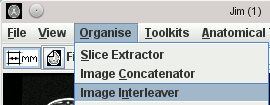 of the main display
frame brings up the Image Interleaver Tool:
of the main display
frame brings up the Image Interleaver Tool:

a, b and
c,
the new output image will have slices in the order
a1,b1,c1,a2,b3,c2,a3,b3,c3 etc.,
where
a1 is the first slice from image
a,
b1 is the first slice from image
b, and
c1 is the first slice from image
c etc.
The new image will be of
the same type as the first input image. The
new image can either be saved to disk, or loaded into Jim
depending on your selection:
button. This will bring up a
File Chooser from which you can select
one or more input images. To select more than one image file, press the
"Control" key down while making your selection. To select all files
in a list, select one file at the top of the list, press the
"Shift" key down, and select a file at the bottom of the list.
You can select any files from the list in this way.
button at any time.
button or button to get them in the right order.
button, or remove just some of the images by
first selecting them, and then clicking the button.
 check-box:
 button to do the
interleaving. If you have chosen to save the result to disk, then a
File Chooser will pop up, prompting
you to choose a file name for the new image. Otherwise, the result
will be loaded into Jim.
button to do the
interleaving. If you have chosen to save the result to disk, then a
File Chooser will pop up, prompting
you to choose a file name for the new image. Otherwise, the result
will be loaded into Jim.
The Dimensionality Changer Tool
Selecting Image Dimensionality Changer from the Organise menu
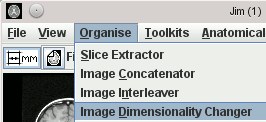 of the main display
frame brings up the Dimensionality Changer Tool:
of the main display
frame brings up the Dimensionality Changer Tool:
 button. This will bring up a
File Chooser from which you can select
one or more input images. To select more than one image file, press the
"Control" key down while making your selection. To select all files
in a list, select one file at the top of the list, press the
"Shift" key down, and select a file at the bottom of the list.
You can select any files from the list in this way.
button at any time.
button or button to get them in the right order.
button, or remove just some of the images by
first selecting them, and then clicking the button.
button. This will bring up a
File Chooser from which you can select
one or more input images. To select more than one image file, press the
"Control" key down while making your selection. To select all files
in a list, select one file at the top of the list, press the
"Shift" key down, and select a file at the bottom of the list.
You can select any files from the list in this way.
button at any time.
button or button to get them in the right order.
button, or remove just some of the images by
first selecting them, and then clicking the button.
 button to do the dimensionality change. If you have chosen to save the result to disk, or if
the result of the dimensionality change will be more than one image, then a
File Chooser will pop up, prompting
you to choose a base name for the newly-created image(s). Otherwise, the result
will be loaded into Jim.
button to do the dimensionality change. If you have chosen to save the result to disk, or if
the result of the dimensionality change will be more than one image, then a
File Chooser will pop up, prompting
you to choose a base name for the newly-created image(s). Otherwise, the result
will be loaded into Jim.
BaseName1, BaseName2,
BaseName3, BaseName4 etc., where BaseName
is the name you chose above. If you increase the dimensionality and the result
is therefore a single output image, the image will be named BaseName.
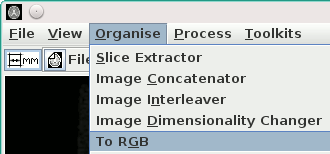
The To RGB Tool
Selecting To RGB from the Organise menu
 of the main display
frame brings up the To RGB Tool:
of the main display
frame brings up the To RGB Tool:
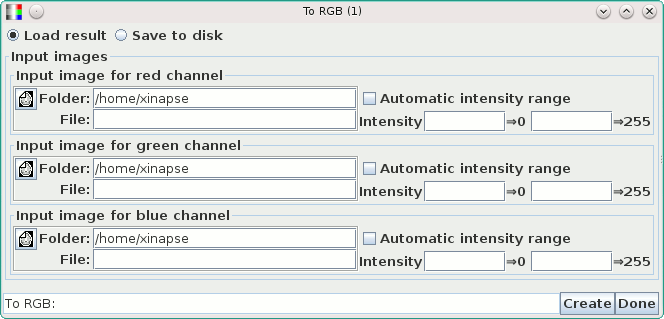
When you have set the three input images, and selected the intensity range for each colour
channel, press the 
 check-box.
In this case, the range will be the 2% and 98% intensity percentiles (excluding any
background zero-intensity pixels).
check-box.
In this case, the range will be the 2% and 98% intensity percentiles (excluding any
background zero-intensity pixels).
 button.
The result is a single colour output image, which can can either be saved to disk, or loaded
into Jim
depending on your selection:
button.
The result is a single colour output image, which can can either be saved to disk, or loaded
into Jim
depending on your selection:
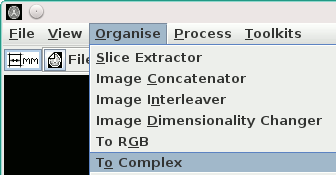
The To Complex Tool
Selecting To Complex from the Organise menu
 of the main display
frame brings up the To Complex Tool:
of the main display
frame brings up the To Complex Tool:


Jim is able to automatically detect what sort of phase image you are using as input and
apply the appropriate scaling to generate Complex output pixel values.
 button.
The result is a single Complex (single-precision, 64-bits per pixel) output image, which can can
either be saved to disk, or loaded into Jim depending on your selection:
button.
The result is a single Complex (single-precision, 64-bits per pixel) output image, which can can
either be saved to disk, or loaded into Jim depending on your selection:
The De-Mosaic Tool
Selecting De-Mosaic from the Organise menu
 of the main display
frame brings up the De-Mosaic Tool:
of the main display
frame brings up the De-Mosaic Tool:
button. This will bring up a
File Chooser from which you can select
one or more input images. To select more than one image file, press the
"Control" key down while making your selection. To select all files
in a list, select one file at the top of the list, press the
"Shift" key down, and select a file at the bottom of the list.
You can select any files from the list in this way.
button at any time.
button or button to get them in the right order.
button, or remove just some of the images by
first selecting them, and then clicking the button.
 check-box. To do it manually, unselect
"Auto configuration", and the set the number of rows and columns of slices in the mosaic using the
check-box. To do it manually, unselect
"Auto configuration", and the set the number of rows and columns of slices in the mosaic using the
 and
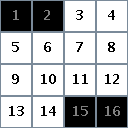
and  spinners. You do not have to take all the slices from the mosaic and copy
them to the output image: you can select only the slices you want. In the grid
showing the individual slices in the mosaic in the example below, slices 1,2,15 and 16 have been
de-selected (by clicking on the square on the grid) so that the de-mosaiced image will contain
only slices 3-14.
spinners. You do not have to take all the slices from the mosaic and copy
them to the output image: you can select only the slices you want. In the grid
showing the individual slices in the mosaic in the example below, slices 1,2,15 and 16 have been
de-selected (by clicking on the square on the grid) so that the de-mosaiced image will contain
only slices 3-14.
 button to do the
de-mosaic. If you have chosen to save the result to disk, or if
the result of the de-mosaic will be more than one image, then a
File Chooser will pop up, prompting
you to choose a base name for the newly-created image(s). Otherwise, the result
will be loaded into Jim.
button to do the
de-mosaic. If you have chosen to save the result to disk, or if
the result of the de-mosaic will be more than one image, then a
File Chooser will pop up, prompting
you to choose a base name for the newly-created image(s). Otherwise, the result
will be loaded into Jim.
BaseName1, BaseName2,
BaseName3, BaseName4 etc., where BaseName
is the name you chose above.