Load
      from ROIs ...
from the File menu of the 3-D Viewer:
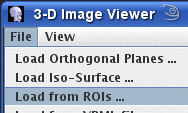
To add Regions of Interest
(ROIs) to the 3-D display, select Load
from ROIs ... from the File menu of the 3-D Viewer:
A dialog will now appear, from which you can select both the image on which the ROIs have previously been defined, and the ROI file.

First, select the image on which the ROIs were defined by clicking on the
 icon, by typing in the folder (directory) and
file name of the image, or by pressing the right mouse
button and selecting from the menu of recently-used images.
icon, by typing in the folder (directory) and
file name of the image, or by pressing the right mouse
button and selecting from the menu of recently-used images.

Next, select the ROIs that you want to display. Either click on the
 button, or type in the path to
the ROI file name (and press return).
button, or type in the path to
the ROI file name (and press return).
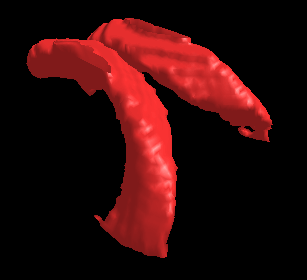
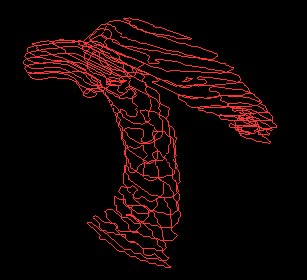
Regions of interest can be displayed in one of two ways:
 As a surface generated and rendered from the regions of interest. In
order to successfully generate a surface, there must be ROIs that overlap in
adjacent slices of the image. If there are isolated ROIs that only appear in
a single slice, no surface can be generated from them.
Furthermore, ROIs that do not enclose an area (Line, Curved Lines, Markers
and Text) cannot be shown as a surface. If a surface cannot be generated,
you will see the message "empty iso-surface" in the status bar of the dialog.
As a surface generated and rendered from the regions of interest. In
order to successfully generate a surface, there must be ROIs that overlap in
adjacent slices of the image. If there are isolated ROIs that only appear in
a single slice, no surface can be generated from them.
Furthermore, ROIs that do not enclose an area (Line, Curved Lines, Markers
and Text) cannot be shown as a surface. If a surface cannot be generated,
you will see the message "empty iso-surface" in the status bar of the dialog.
 As planar polygonal shapes. All types of ROI will be shown in the 3-D display,
with the exception of Text ROIs,
which will be shown in the same way as
Markers (as a small cross).
As planar polygonal shapes. All types of ROI will be shown in the 3-D display,
with the exception of Text ROIs,
which will be shown in the same way as
Markers (as a small cross).
These two modes of display are illustrated for a set of ROIs outlining the lateral ventricles:
 |
 |
|---|---|
| Surface rendered | Outlines |

 button and select the new colour from
the colour chooser that will pop up.
button and select the new colour from
the colour chooser that will pop up.
 spinner. The shininess
only affects the appearance if a surface is shown - it does not affect
polygonal ROI outlines.
spinner. The shininess
only affects the appearance if a surface is shown - it does not affect
polygonal ROI outlines.
The effect of selecting the
 check-box is dealt with in the section about
general controls.
check-box is dealt with in the section about
general controls.
If you click the  button, the ROIs will be removed from the 3-D viewer.