
Note: These colours are configurable in the user preferences.
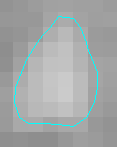
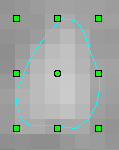
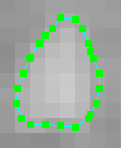
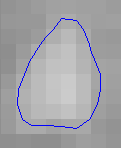
These five states are shown below for a small irregular ROI:
|
|
|
|
|
|---|---|---|---|---|
| Unselected | Selected | Selected and editable | Editing outline | Deleted |
Note: Deleted ROIs are not normally visible. To view deleted
ROIs select the Show Deleted ROIs check-box in the View menu of
the ROI Toolkit window: 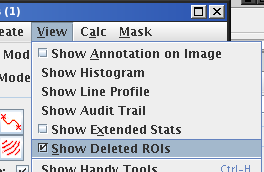 .
.
You change from one state to another according to these rules:

Edit Mode, a
selected ROI is automatically editable. When in View Mode an
ROI is never editable.
Edit
  Outline
from the Edit menu in the ROI toolkit, or using
the keyboard accelerator "Control-O".
Show Deleted ROIs check-box in
the View menu of the ROI toolkit. See the audit trail section for more information.
You can also select ROIs by lassoing them. To lasso one or more ROIs, hold down the left mouse
button and drag the mouse to enclose ROIs as shown below. Any ROIs within the red dotted lasso
rectangle will be selected when the mouse button is released.
To learn how to edit ROIs see the ROI
editing section.
You can select ROIs that are connected (overlap) in adjacent slices by first selecting one or more
ROIs, and then pressing the
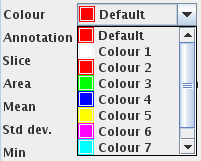
The default ROI colours depend on the state of the ROIs, as shown
above. However, you can also set the colour of ROIs (including the colour of
Text ROIs) individually.
To set the colour of an ROI, first select it.
Then choose the colour from the menu of possible colours in the ROI Toolkit:
There are eight colours to choose from, labelled
When you explicity set an ROI colour from the palette, it will be displayed
with that colour regardless of its state. Only the handles that appear on an
ROI will show you that it is selected.
Note: if you save ROIs to disk with certain colours, and then change
your palette of colours, when you reload the ROIs from disk, they will be
shown with different colours from the new palette.
You can use a keyboard accelerator to set the colour of a selected ROI: press
the digits 1 to 8 to set a colour from the palette, or the digit 0 (zero) to
set back to the default colour.
View Mode provides a way to view previously-defined ROIs in a
safe way, without the possibility of accidentally changing
them. When in View Mode, ROIs may not be edited in any way. To
switch between Edit and View Modes, select the appropriate
button at the top of the ROI Toolkit frame:

Lassoing ROIs with a mouse drag gesture. button
(keyboard accelerator:
button
(keyboard accelerator: j). This button only becomes
active when there are ROIs in different slices. This action checks in slices adjacent for ROIs
that connect, or overlap with the selected ROIs, and also selects the overlapping ROIs. It also
checks for overlapping ROIs in adjacent to these newly-selected ROIs and propagates across all
slices to select ROIs that form connected regions in 3-D.
Note: although ROIs may be selected by this method across multiple slices, this may not
be evident if the slices containing selected ROIs are not visible on screen. Care must be taken when
performing operations on ROIs selected in this way, since any changes to ROIs may not be evident.
ROI Colours
 .
.
Colour 1 to
Colour 8, as well as the default colours as above. Although you
are restricted to one of eight colours, you can choose any eight colours
to be your colour palette. To choose a different palette of eight colours, set
them in the user preferences. If you choose a
colour from the menu before creating an ROI, the newly-created ROI will have
the chosen colour.
Edit and View Modes
