Task-Based Help - MTR and MTR Histograms
In this third example, we will compute magnetisation transfer
ratio (MTR) images, and whole-brain MTR histograms.
For this measurement we will use a pair of images: one without
off-resonance saturation pulses, and one where these pulses are
included. The first image is normally a regular
proton-density-weighted image that may be acquired using a
spin-echo or gradient-echo sequence. The second image is acquired
in an identical way to the first, except that it includes
additional off-resonance RF saturation pulses that affect the
longitudinal magnetisation of protons in the larger molecules,
such as cell membranes. These two images will be referred to as
M0 and Ms respectively.
The analysis comes in three stages:
- Removal of non-cerebral tissue from the
M0
image.
- Calculation of the MTR image.
- Production of the MTR histogram.
Removal of Non-Cerebral Tissue
- The multi-slice
M0 and Ms images
need to be in two separate UNC, Analyze or NIFTI image files before
analysis starts. Use the image
converter to create these two images. If your pulses sequence
puts the two images into one image file, use the Slice Extractor tool to
separate them out into two image files. The two images must have
the same number of rows, columns and slices.
- Load the proton-density-weighted image into Jim, and
use the Brain Finder tool to isolate the brain and CSF from any
surrounding cranial tissue on each slice of
the image. The procedure for doing this is described in the
section on finding the
brain outline.
Below is an example of a proton-density image before and after
removal of extra-cerebral tissue.
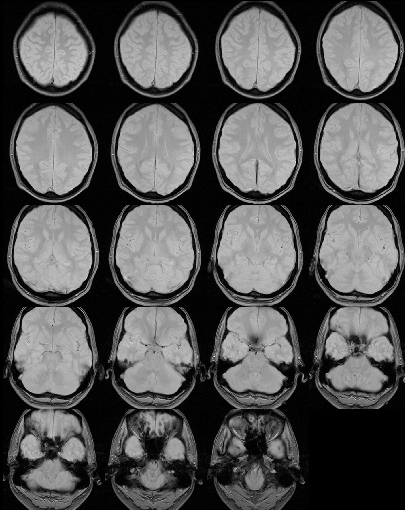
Before extra-cerebral tissue removal.
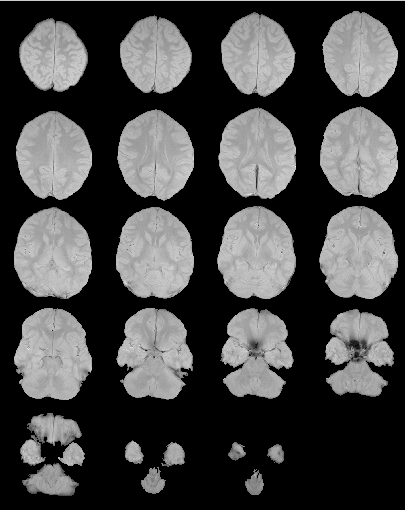
After extra-cerebral tissue removal.
Save the edited proton-density image to a new file.
Calculation of MTR
- Decide on an intensity threshold for MTR calculation. The MTR
calculation will only be applied to pixels where the intensity is
above the threshold. This prevents the calculation of MTR for
pixels that just contain background noise. Load the image with the
saturation pulses applied into Jim.
Bring up the image statistics
dialog to show the histogram of pixel intensities. Many images
have a large number of pixels with zero intensity: ensure that
you have the  check-box selected in the
image statistics dialog, which will remove the large histogram peak at zero intensity.
The image statistics window will now show the image intensity
histogram:
check-box selected in the
image statistics dialog, which will remove the large histogram peak at zero intensity.
The image statistics window will now show the image intensity
histogram:
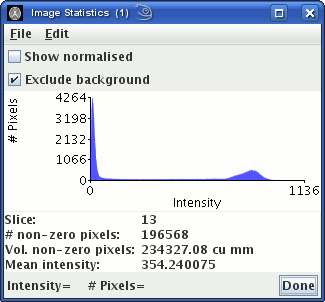
The peak to the left is from pixels outside the head that contain
just noise. Choose an intensity threshold so that most of pixels
that contain just noise are below the threshold. In the example
above, you can see that a threshold of about 100 would remove the
peak to the left. The choice is not critical, but do not choose
too high a threshold, or pixels containing tissue of interest may
be removed.
- Start the Algebra Tool.
Insert the threshold chosen above into the
Thresholdfield.
- Decide whether you are doing regional MTR estimation, or MTR
histogram analysis.
- For regional MTR analysis, a resolution in MTR of 0.1 percentage
units is appropriate. From the
Presets menu, select Magnetization
Transfer Ratio (MTR) (0.1% bins). The MTR
calculation will produce an image with intensities between 0 and
1000 (note the scaling factor of 1000 in the formula). 0
corresponds to 0% MTR, and 1000 corresponds to 100% MTR. Thus, changes of
1 intensity unit correspond to changes of 0.1% in MTR.
- For MTR histogram calculation, a resolution in MTR of 1 percentage
unit is appropriate. From the
Presets menu, select Magnetization
Transfer Ratio (MTR) (1% bins). The MTR
calculation will produce an image with intensities between 0 and
100 (note the scaling factor of 100 in the formula). 0
corresponds to 0% MTR, and 100 corresponds to 100% MTR. Thus, changes of
1 intensity unit correspond to changes of 1% in MTR. This larger bin width
will help to smooth the histogram.
- Load the edited (brain masked) proton-density image and the image with saturation
pulses into the appropriate places in the
Input Images panel by
clicking on the  icon. Note that first image is
the proton-density image (
icon. Note that first image is
the proton-density image (M0) and the second is the image with
saturation pulses (Ms). Click on the
 button to start the MTR calculation.
If you want to save the MTR image, select this from the option
in the Algebra Frame.
button to start the MTR calculation.
If you want to save the MTR image, select this from the option
in the Algebra Frame.

However, you can always save the
result later from the File menu of Jim's display.
- You can now do regional analysis
on this MTR image, or you can go on to form the MTR histogram.
MTR Histogram
- If not already loaded, load the
calculated MTR image into Jim, and bring up the
Image Statistics window.
- It is usual to reduce the influence of CSF on the MTR
histogram by providing a cut-off MTR value below which pixels are
not included in the MTR histogram. The usual value is an MTR of
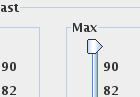
10%. Adjust the Min Contrast slider to a value of 10:

Note: this min. value applies if the bin width chosen was 1
MTR percentage unit; if you used a bin width of 0.1%, then the
min. value should 100.
Also set the Contrast Max slider to its maximum possible value, to
ensure that no pixels with high MTR are excluded from the
histogram:
- Make sure you
have a display layout showing more that one image
slice, and that you do not have a selected slice.
In this way, the image statistics shown will apply to the whole
multi-slice data-set, not a specific slice. The Image Statistics
viewer will now show the whole-brain MTR histogram.
- Click on the
 check box
if you want to produce a normalised MTR histogram. For normalised
histograms, the total area under the MTR histogram sums to 1.0.
check box
if you want to produce a normalised MTR histogram. For normalised
histograms, the total area under the MTR histogram sums to 1.0.

- Write the histogram to file, for importing to your favourite
statistical analysis package. From the Image Statistics
File menu,
choose Write: 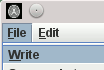 . A File Chooser now pops up prompting
you for a file name to save the histogram.
. A File Chooser now pops up prompting
you for a file name to save the histogram.